Recording Yourself on Windows
Recording podcasts remotely is a great way to connect and produce content. Depending on your internet connection though, you can experience some drops in the quality of the recording. By self-recording a backup on your computer you can ensure there is a high quality version without any connection issues. This guide will take you through that process for Windows, if you use a Mac follow this guide.
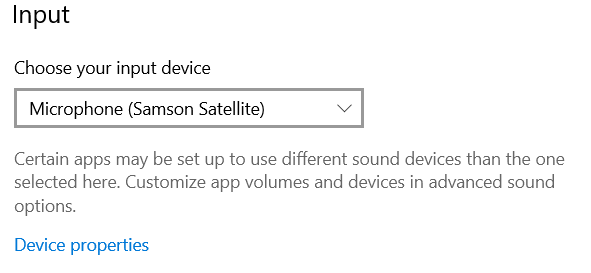
Before starting the Voice Recorder ensure the correct microphone is selected. Right click the speaker icon in the bottom right corner of the screen and click Open Sound settings.
Select the correct input device from the drop down menu.
Open Start (the Windows button) Type “Voice Recorder” and select the top result to launch the app.
Click the Record button, you will know it is recording when the time starts going up.
Click the Stop button to end the voice recording.
To rename a file after recording, select it from the left pane and then click the Rename button from the bottom-right corner.
These files will generally be too large to email, so you can share it with your preferred app. You can do this by clicking the share button, or by opening the file location and sharing from there.
WeTransfer.com is a great site for sending files too large to be shared in other ways. Simply select the file you wish to share, and enter the email you wish to share to along with your email.
Advanced Tips:
Click the Flag button to add markers to your recording. This will not interrupt the recording, but allow you to jump to important parts of the recording afterwards.
To trim a recording select it from the left pane and click the Trim button from the bottom-right corner.
Use the pins to select the new beginning and end to the recording.
Click the Save (floppy disk) button from the bottom-right corner, the Save a Copy option is recommended so you don’t overwrite the original.


